The base is 8' wide and 12' - 3" long. The side and back walls are 8' squares. The front wall consists of an 4' x 8' bottom section with three 30" high hinged upper sections. The structure at the back is basically a 4' x 8' (outside dimension) warm room - storage room - control room. I had many of the parts and pieces of this building, (yeah I know ... it looks like it, doesn't it ;-) so my out of pocket costs are so far under $800. If I had to buy everything new - including the coat of paint still needed, the total cost would have been under $1500. That price includes the cement and mounting plate and hardware for the pier and wedge, the 250' of 10 gage copper and branch circuit breaker to feed the building, and the wiring and breaker box within. I provided all the labor. I will still have to raise this structure and the pier a foot or more to get it above the winter snow line, but the posts have already been bought, and it's a project-improvement for next summer.
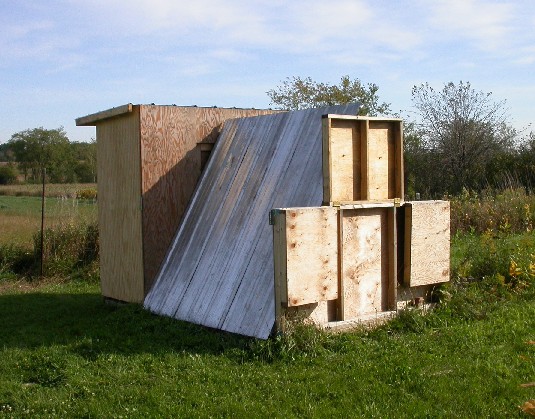
Normal closed position. Everything is bolted and pinned together. The sides are held together with two bolts up front and two pins at back. Two wing nuts hold the upper front piece to the side walls. See detail images further below.
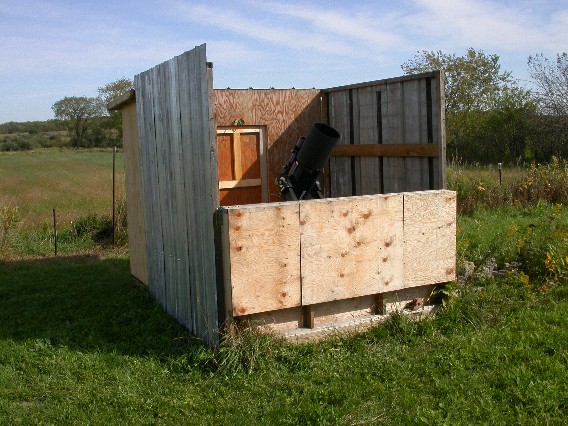
Normal operating position. To open, two pins that lock the sidewall to the back wall are pulled, and two wing nuts that bolt the sidewall to the front wall are removed. Then the wall, hinged at the bottom is pushed out. Safety chains prevent it from opening too far. The back pins are reset in their new position and the front wing nuts bolt the front to the side walls in their new position. Visibility is 50 degrees down from zenith to the north, to the south the view is clear to the horizon for 50 degrees either side of due south, and east and west, the worst case is 35 degrees down from the zenith to due east and west. There is excellent wind protection to N, E, and W. Fair to poor to south as shown, but putting up the hinged front wall extensions then gives excellent protection to the south. Visibility with them up is limited to 35 degrees down from Zenith due south. Not all sections may need be raised, which gives full south visibility through an un-raised section(s).
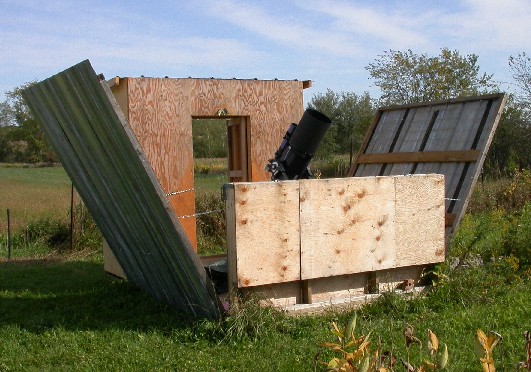
Fully open. Either or both sides can be opened. A partially open configuration gives fair wind protection when blocked on the windward side. Visibility when open is at worst (due east or west) 25 degrees above the of horizon. For doing a wedge altitude adjustment using east or west drift alignment stars, they can be seen and tracked from as low as 10 degrees of the east or westward horizon

Shielded from south and southeast breezes. If the dew shield is taken off, the air will be still around the scope even from fairly stiff breezes. There's even better protection if all three hinged extensions are up, but I like having a little view out, and all three sections are almost never is needed. Note too, that with the sides up, because there is some shielding from the sky, there is less dew that settles on the equipment than in an open field situation
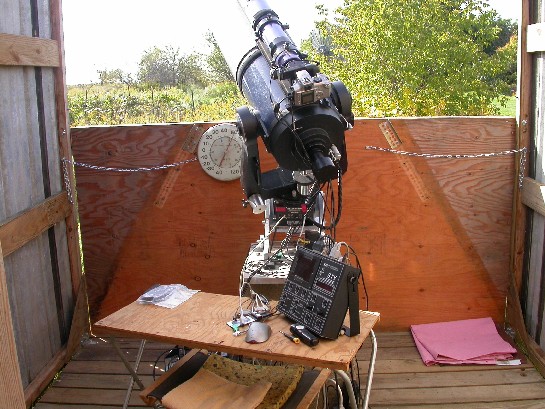
Normal imaging configuration. Note that the pier is offset forward in the 8' square operating area. This is a Very important and intentional design feature, because it gives more room behind the scope for table and chair and me, and gives a lower view to the north. The pier is set back from the south enough to get comfortably past the front of the scope, or to park the scope in the horizontal position with the dew shield on and the south wall closed

Closed position, viewed through open door looking south. There's adequate room to get past the 10" scope on the right. On the left the table does have to be shifted to get past, but when open, there's plenty of room on the left. The design is intentionally loose at the seams. It keeps the space from becoming an oven during the day, and has the bonus of being Much easier to put together, and minimizes cost. At this time, thanks to the steel that extends past the tops of the side frames, no rain water comes in, although I cover the scope and table with a couple of old shower curtains for insurance. If I were doing this again, rather than bringing the two sides together to a common point at the peak, I'd nest one side under the other. If snow has a tendency to sift in and become an issue during this winter, I may do this yet.
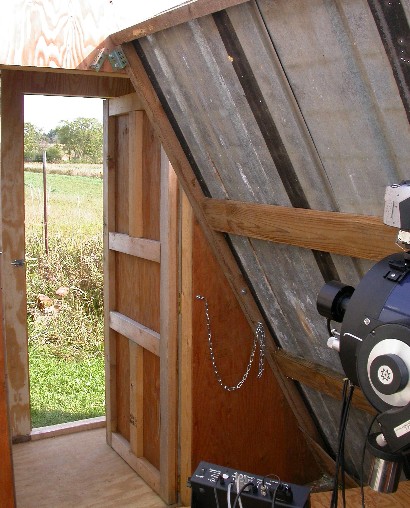
View from inside the imaging area through the warm room to outside. Although the door into the scope area needs to be centered with the A frame, the outside entrance is offset to the right. That leaves the warm room with a small but adequate area (wall lengths of 30" x 40" x 44" inside dimension) on the left side to set up and run the control area, and some room on the right behind the doors for shelving and storage, and sill room for a clear passageway through. Note the angle irons at the top center of the door. They are just stops/rests for the walls. They are pinned in place lower down. I may put a piece of chain (like the safety chains) to join the side walls up by the angle irons.
Front corner detail. A bolt slides through an angle iron bolted to the side of the front wall and through the frame of the side wall. A wing nut secures the two walls together. Note the bolt protruding through the side wall above the wing nut. This bolt drops through a hole in another angle iron on the inside of the front wall when the side is closed. The wing nut that was removed from the configuration above, now spins onto this bolt and holds the two walls together in the closed position.
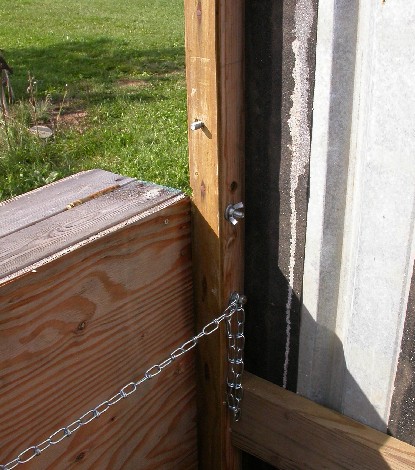
Back (northwest) corner detail. All that is needed on either wall at the back (north) is a pin that gets pushed in place. When open it goes through the side wall into an angle iron bolted to the side of the back wall when open, or into the back wall itself when closed. The extra loop of chain on the left accommodates opening the side walls to the full open position.

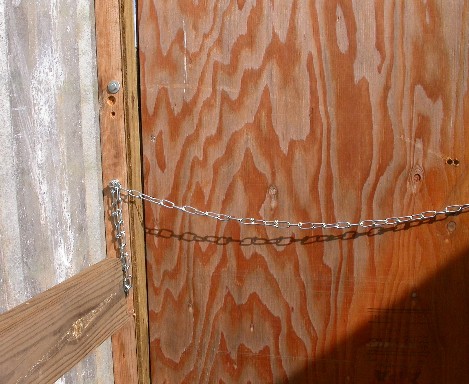
The steel siding extends above and below the 8' tall wall framing. That keeps the water out of the top when closed, and away from the wood framing when running off the bottom.
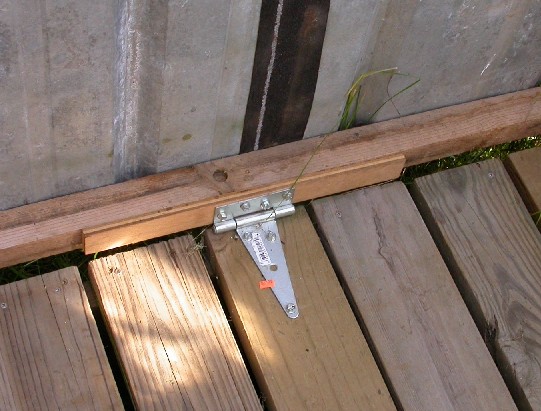
Three heavy hinges hold the side walls to the floor. Note they are placed so that the wall can open further than just 90 degrees up. This placement also gives a full 8' inside opening from side to side. The floor is made of 8' 2x6's. The loose or open decking is intentional. It allows dirt and coffee spills to fall through, and it cools and ventilates better, and it's easy to remove a piece or more if you want to run any wiring or or cables or anything else under the floor